Autologin
The Autologin endpoint lets you log a user into WordPress by passing a valid JWT - no username or password form needed. This is ideal for:
- Magic-link emails - generate a signed link and email it to the user
- SSO flows - redirect users from an external system directly into WordPress
- Mobile apps - open a webview session without re-prompting for credentials
- Cross-domain redirects - seamlessly land users on a specific page after authentication
The plugin validates the JWT, identifies the WordPress user from the token payload, creates the authenticated session, and redirects the user to the configured destination.
Explore and test this endpoint using the interactive API reference →
Endpoint
METHOD: GET
ENDPOINT: /simple-jwt-login/v1/autologin
URL Example: https://{{yoursite}}/?rest_route=/simple-jwt-login/v1/autologin&JWT={{JWT}}&AUTH_KEY={{AUTH_KEY_VALUE}}
| Parameter | Type | Description |
|---|---|---|
JWT | required string | Your JWT. Can alternatively be passed as Authorization: Bearer <token>. |
AUTH_KEY | optional string | Auth Code value. Required only if "Require Authentication Code" is enabled. The parameter name matches the Auth Code URL Key in Auth Codes settings (default: AUTH_KEY). |
redirectUrl | optional string | If provided and "Honor the redirectUrl parameter" is enabled in settings, the user is redirected here after a successful login instead of the configured destination. |
Parameters can be sent as query params.
Request
https://{{yoursite}}/?rest_route=/simple-jwt-login/v1/autologin&JWT={{JWT}}&AUTH_KEY={{AUTH_KEY_VALUE}}
Or via Authorization header:
GET /wp-json/simple-jwt-login/v1/autologin
Authorization: Bearer YOUR_JWT_HERE
Responses
200
The browser is redirected (HTTP 302) to the WordPress site or the custom redirectUrl. The response body is empty HTML; the redirect is handled via HTTP headers.
400
Bad request - unclassified error (e.g. malformed JWT encoding).
{
  "success": false,
  "data": {
    "message": "Invalid JWT.",
    "errorCode": 25
  }
}
401
Unauthorized - JWT is invalid, has a bad signature, is expired, is revoked, or the auth code is wrong.
{
  "success": false,
  "data": {
    "message": "JWT has expired.",
    "errorCode": 14
  }
}
403
Forbidden - auto-login is disabled in plugin settings, or the client IP is not on the allow-list.
{
  "success": false,
  "data": {
    "message": "Auto-login is not enabled.",
    "errorCode": 26
  }
}
404
The WordPress user identified by the JWT payload could not be found.
{
  "success": false,
  "data": {
    "message": "User not found.",
    "errorCode": 24
  }
}
500
Internal server error.
{
  "success": false,
  "data": {
    "message": "An unexpected error occurred.",
    "errorCode": 22
  }
}
Examples
SHELL
curl 'https://simplejwtlogin.com/?rest_route=/simple-jwt-login/v1/autologin&JWT=mysecretjwt&AUTH_KEY=mysecretauthcode'
PHP
Using the simple-jwt-login PHP Client:
$simpleJWT = new \SimpleJwtLoginClient\SimpleJwtLoginClient(
    'https://simplejwtlogin.com',
    '/simple-jwt-login/v1'
);
$url = $simpleJWT->login('Your JWT');
header('Location: ' . $url);
JavaScript
var JWT = 'myJWT';
var AUTH_KEY = 'MY_SECRET_AUTH_CODE';

window.location.href =
  'https://simplejwtlogin.com/?rest_route=/simple-jwt-login/v1/autologin&JWT=' + JWT + '&AUTH_KEY=' + AUTH_KEY;
Error responses
All error responses follow the standard envelope:
{
  "success": false,
  "data": {
    "message": "Human-readable error description",
    "errorCode": 26
  }
}
Common error codes:
| Code | Meaning |
|---|---|
23 | JWT is missing from the auto-login request. |
24 | User not found - no WordPress user matches the JWT claims. |
26 | Auto-login is not enabled in plugin settings. |
27 | Invalid Auth Code provided. |
28 | Client IP is not on the allowed IP list. |
29 | The configured JWT payload property (sub-key) could not be found in the token. |
30 | The configured JWT payload property (user key) could not be found in the token. |
68 | The JWT issuer (iss) is not on the allowed list. |
JWT decoding errors (1-22) may also appear when the supplied token cannot be parsed or its signature is invalid.
Settings
Configure under Settings → Simple JWT Login → Autologin.
Auto-Login

Enable or disable the autologin endpoint. When disabled, all GET requests to /autologin return a 403 error. When enabled, users can log in by passing a valid JWT via URL parameter or Authorization: Bearer header.
Require Authentication Code

When enabled, an additional Auth Code must be provided alongside the JWT to allow login. The parameter name is the Auth Code URL Key from Auth Codes settings (default: AUTH_KEY). Configure the codes themselves in the Auth Codes tab.
Redirect Behavior
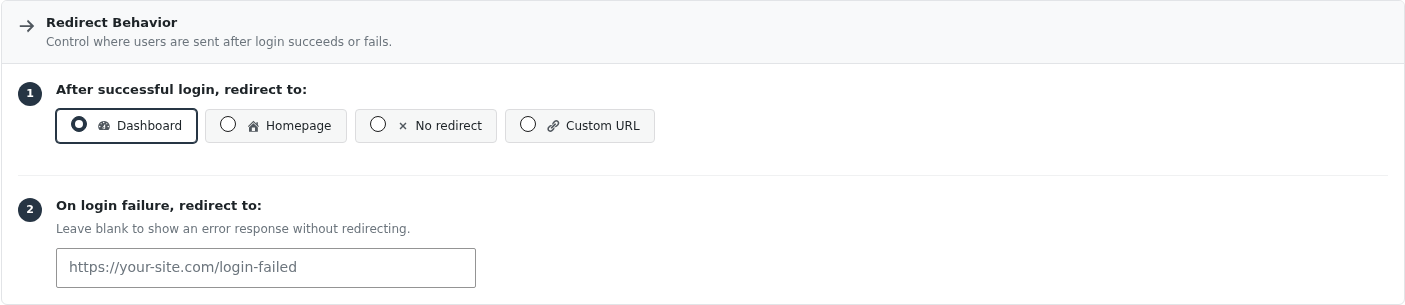
Controls where users are sent after login succeeds or fails.
After successful login, redirect to:
| Option | Description |
|---|---|
| Dashboard | Redirects to the WordPress admin panel (/wp-admin/). |
| Homepage | Redirects to the site's front page. |
| No redirect | No HTTP redirect is performed; the response is returned directly. |
| Custom URL | Redirects to the URL you specify in the text field below the options. |
On login failure, redirect to:
Enter a URL to redirect the user when login fails (e.g. expired token, invalid auth code). Leave blank to return an error JSON response without redirecting.
On the failure redirect page you can display the error message returned by the plugin using the simple-jwt-login:request shortcode:
[simple-jwt-login:request key="error_message"]
Advanced Options
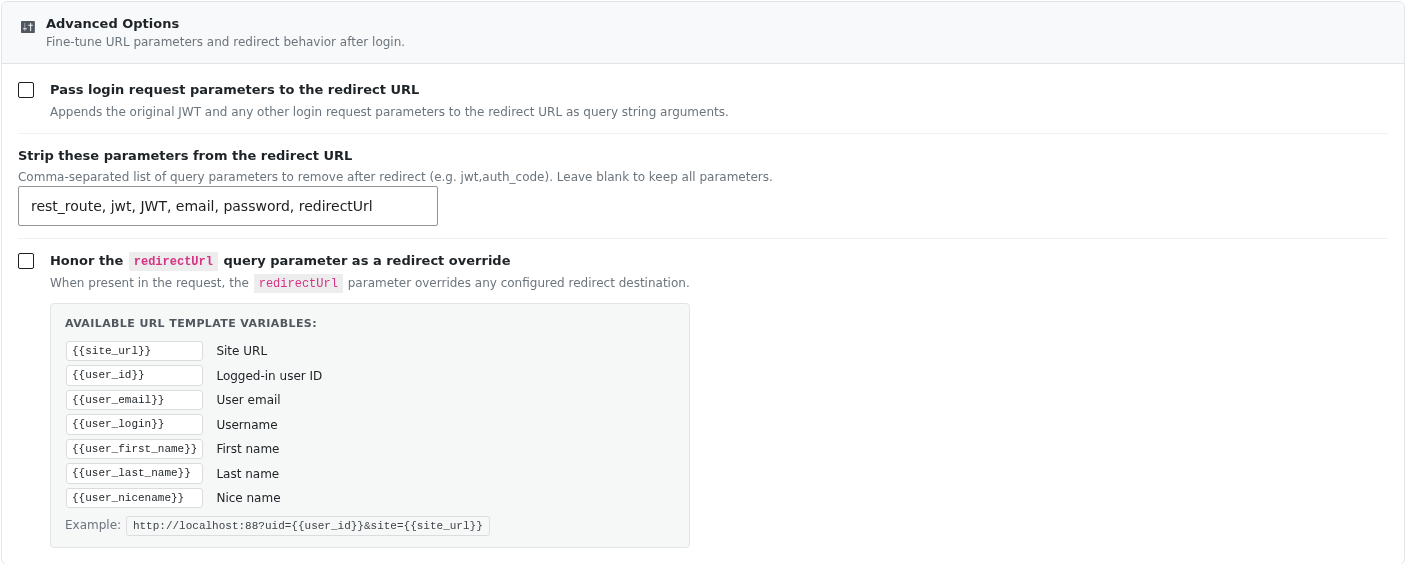
Pass login request parameters to the redirect URL
When enabled, the original JWT and any other login request parameters are appended to the redirect URL as query string arguments.
Strip these parameters from the redirect URL
Comma-separated list of query parameters to remove after redirect (e.g. jwt, auth_code). Useful for cleaning sensitive values out of the browser address bar. Leave blank to keep all parameters.
Honor the redirectUrl query parameter as a redirect override
When enabled, including redirectUrl in the autologin request overrides the configured redirect destination. This allows per-request redirect targets, useful for magic-link emails that need to land users on a specific page.
Available URL template variables:
Use these placeholders in your custom redirect URL or in the redirectUrl parameter. They are replaced with actual values at redirect time.
| Variable | Description |
|---|---|
{{site_url}} | The site URL |
{{user_id}} | The logged-in user's ID |
{{user_email}} | The logged-in user's email address |
{{user_login}} | The logged-in user's username |
{{user_first_name}} | The user's first name |
{{user_last_name}} | The user's last name |
{{user_nicename}} | The user's URL-friendly name |
Example:
https://yourdomain.com/profile?uid={{user_id}}&site={{site_url}}
Access Control

Restrict autologin to requests from specific sources. Leave fields blank to allow all.
Allowed IP Addresses
Comma-separated list of IP addresses allowed to use the autologin endpoint. Leave blank to allow all IPs.
Allowed JWT Issuers (iss)
Comma-separated list of accepted iss (issuer) claim values. When set, a JWT whose iss does not match any value in this list is rejected with error code 68. Leave blank to accept any issuer.
FAQ
How do I tell the plugin which field in the JWT contains the WordPress user ID or email?
In the plugin settings, set the "JWT Parameter Key" field to the name of the JWT payload property that holds the user identifier.
For example, if your JWT payload looks like this:
{
  "sub": "1234567890",
  "name": "John Doe",
  "UserID": 123456
}
Set JWT Parameter Key to UserID. The plugin will use that value to look up the WordPress user.