Setup
Create an application
To enable Google authentication in your application, follow these step-by-step instructions to create a new project and obtain the necessary credentials from the Google Developer Console.
- Navigate to Google Developer Console https://console.developers.google.com/apis/
- Create a new project
- Once the project has been created, go to "Credentials" and click on "+Create Credentials"
- Select "OAuth client ID"
- Choose Application Type "Web application"
- Configure Authorized Redirect URIs: In the "Authorized redirect URIs" section, add the URL where the OAuth flow will redirect users after successful authentication. This URL is crucial for the OAuth process.
- Copy
client_id,client_secret, andredirect_uri
note
If you want to use OAuth on WordPress, you need to add int the Authorized redirect URIs the following URL:
http://{{your-wordpressdomain}}/?rest_route=/simple-jwt-login/v1/oauth/token&provider=google
Important Notes
- Keep your credentials secure. Do not expose them in publicly accessible locations or version control systems.
- If your application has multiple environments (e.g., development, production), create separate OAuth client IDs and redirect URIs for each environment.
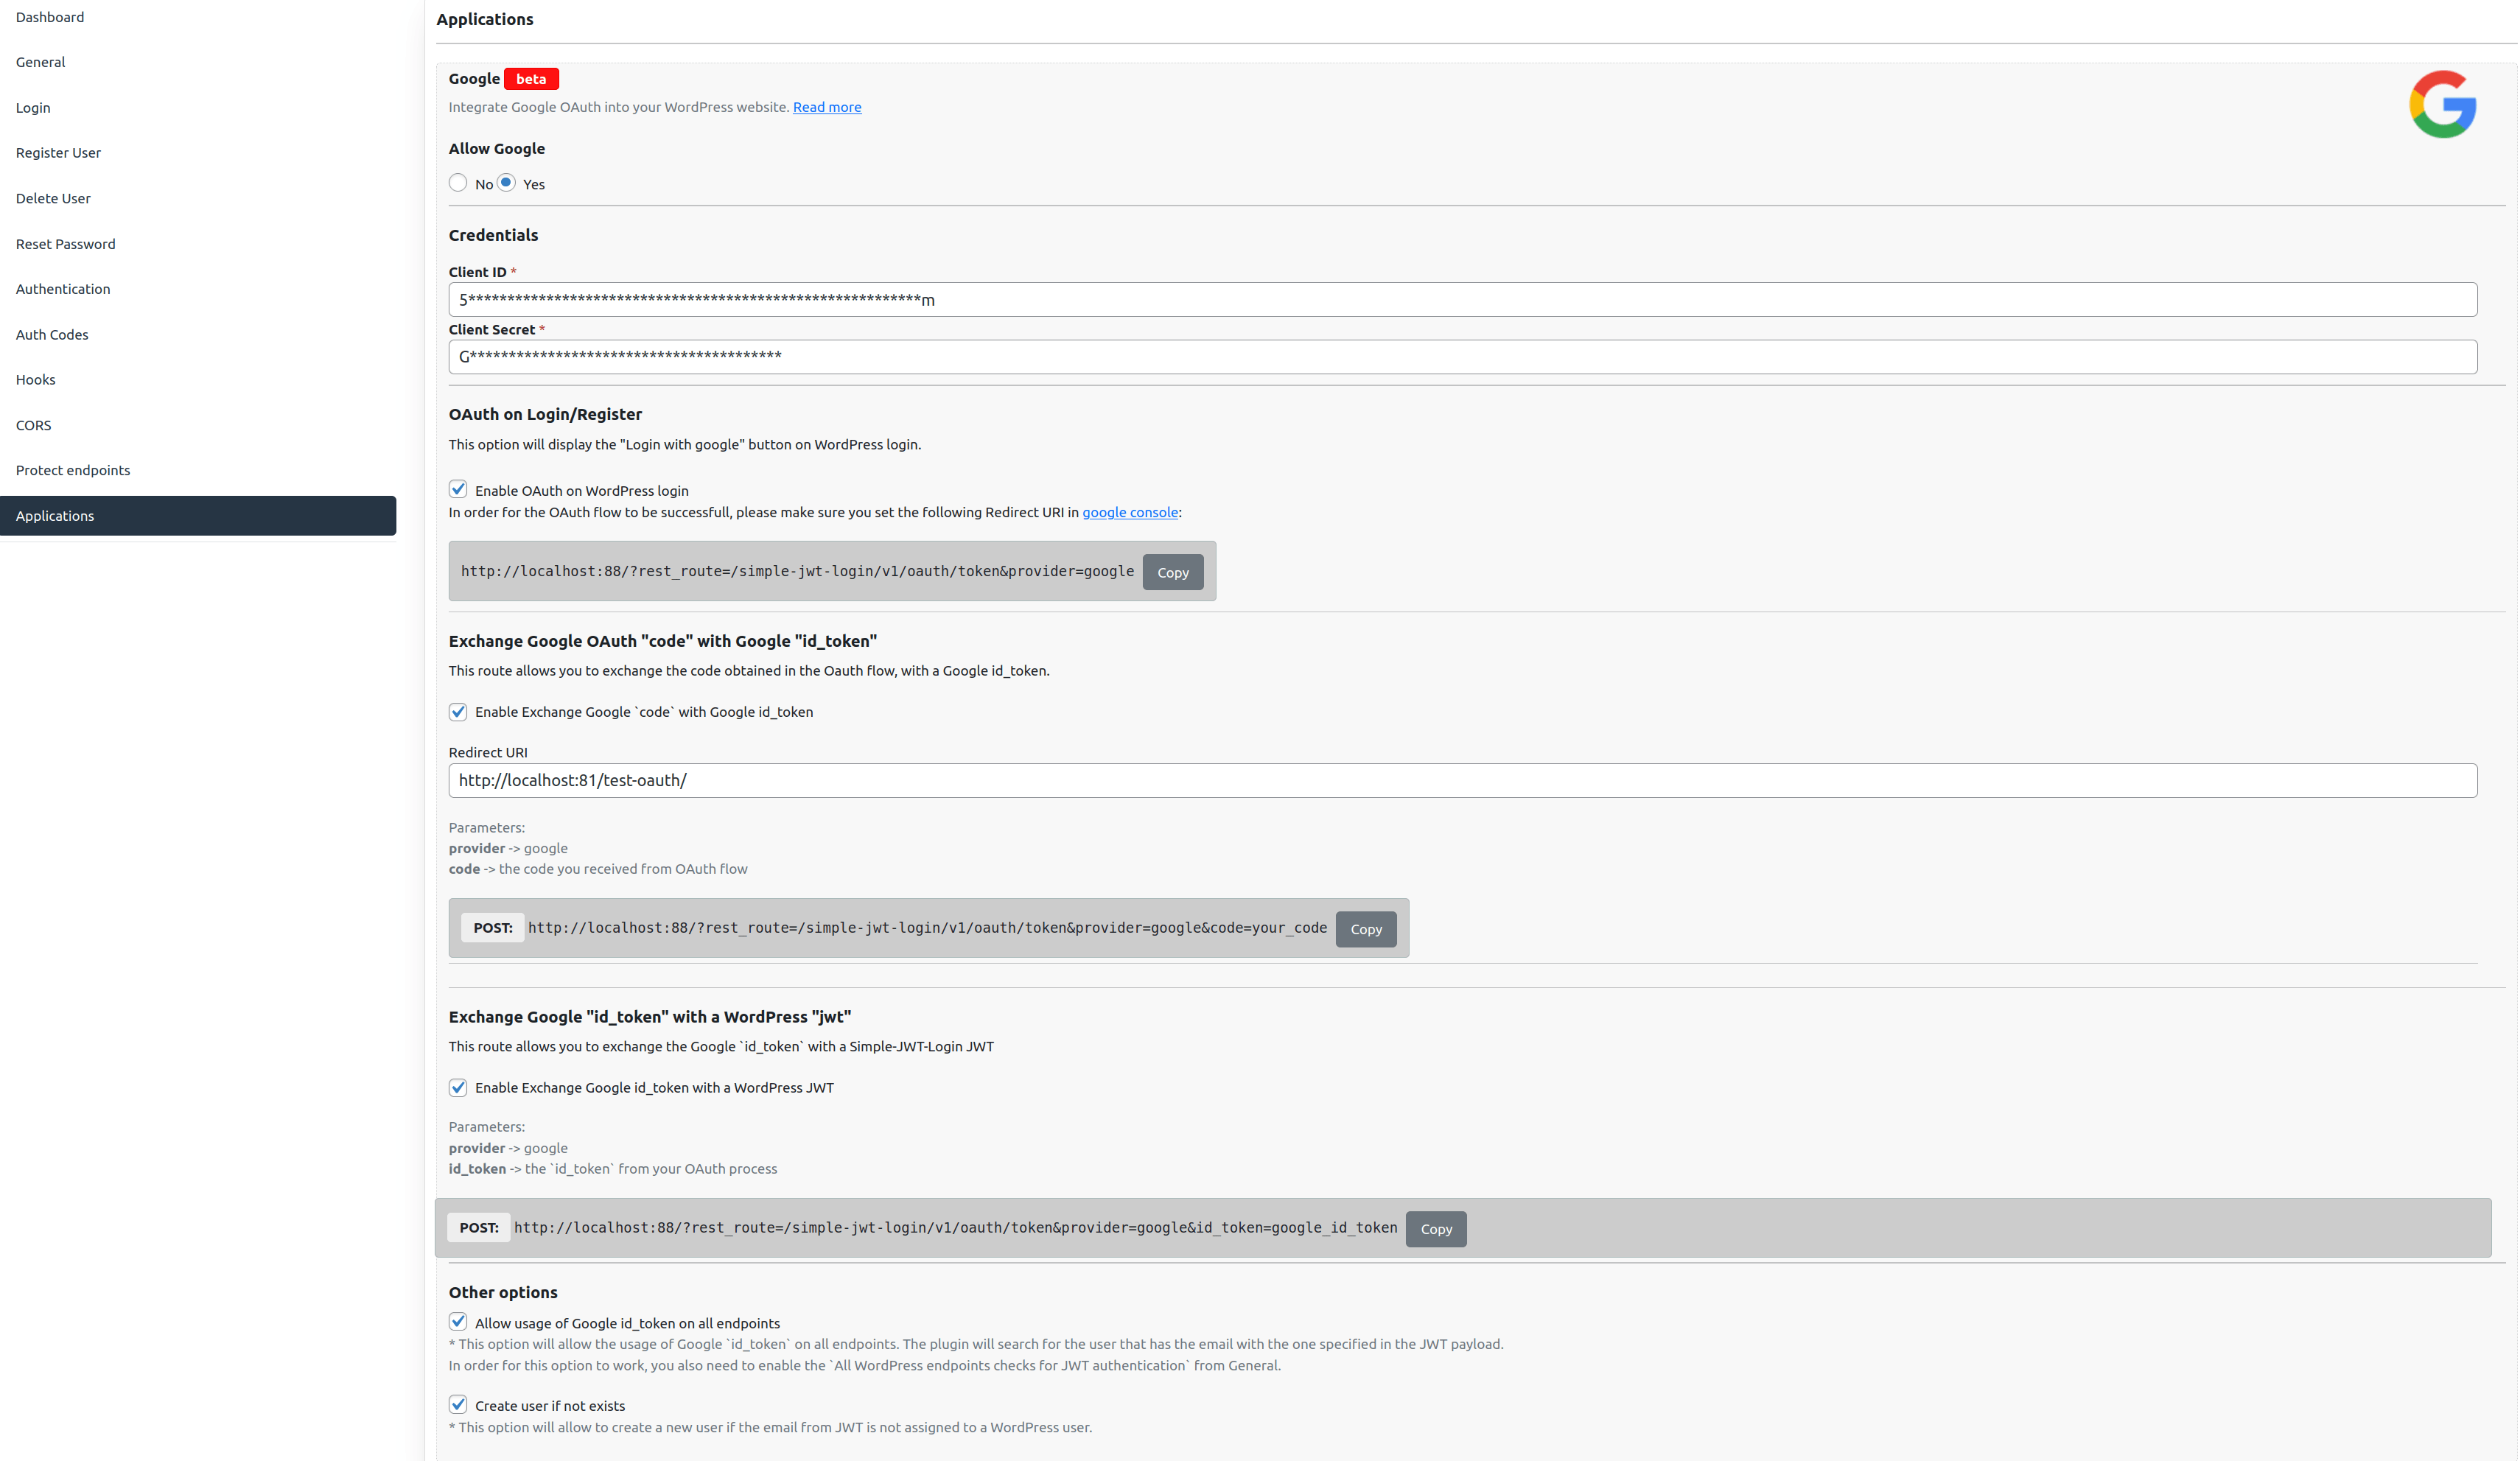
Google Setup In WordPress
- Go to Simple-JWT-Login plugin -> Applications
- Fill
client_id,client_secret,redirect_uri - Change
Allow GoogletoYes.
Screenshot